How To Use Adobe & Canva Together To Create Standout Printables For Etsy
Jul 15, 2026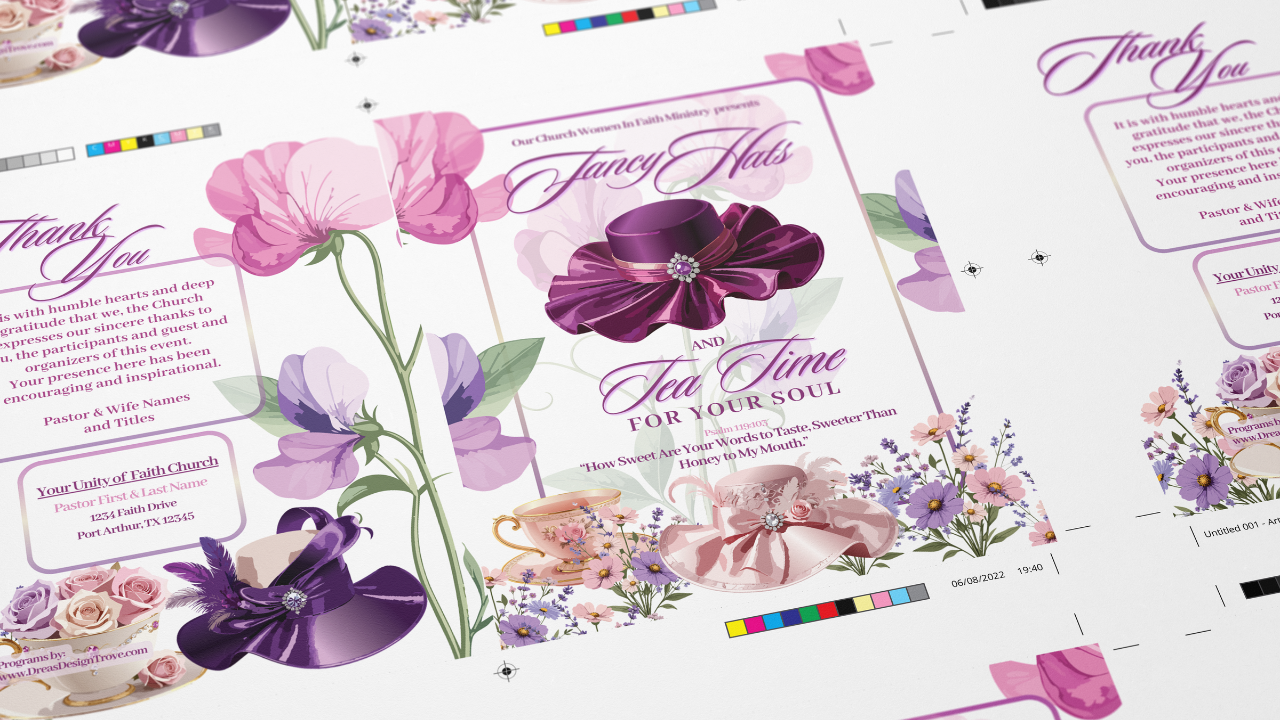
If you’ve ever opened Adobe Photoshop or Illustrator and thought, “Wow, this feels intense,” but then hopped into Canva and felt, “Okay, this I can handle,” you’re in exactly the right place. A place where you can actually see the power of using tools together for producing incredible artwork.
Thus, the truth is, you don’t have to choose between them.
Adobe gives you serious creative power and advanced AI tools like Firefly and Canva gives you a simple, friendly workspace your Etsy customers will actually know how to use for their purpose.
When you combine them intentionally, you can create original, high-quality print designs that don’t look like everyone else’s template designs, but are still easy for your buyers to customize and enjoy.
In this post, we’ll walk through:
- What Adobe’s AI tools (like Firefly) can do for your print designs
- How agentic tools like Gemini or ChatGPT fit into your creative workflow
- Why Canva is still the perfect platform to build and deliver templates
- A practical step-by-step workflow you can follow to create Etsy-ready products
Why Adobe’s AI tools are so powerful for Etsy printables
Let’s start with Adobe.
Photoshop and Illustrator are industry-standard tools for professional designers, and now they’re even more powerful because of AI features like Adobe Firefly.
Here’s what that actually means for you as an Etsy seller, in plain language.
1. You can create truly custom artwork
With Adobe’s AI features, you can:
- Generate unique backgrounds that match a mood or theme
- Extend, edit, or refine images so they fit your layout perfectly
- Adjust color, texture, and lighting so everything feels cohesive
Instead of pulling the same stock elements from Canva that thousands of other sellers are using, you’re creating visuals that are original to you and your shop.
2. You can experiment quickly without starting from scratch
Adobe’s AI helps you:
- Try out different styles (boho, minimalist, vintage, bold, playful)
- Test new compositions and layouts much faster
- Fine-tune details like shadows, grain, and highlights that give your work a “premium” feel
This is where Adobe shines: the level of control and polish you can get in your artwork.
3. You can plug in agentic tools like Gemini & ChatGPT
Think of tools like Google Gemini and ChatGPT as your creative assistants that live around your Adobe work.
They’re great for:
Brainstorming product ideas
“Give me 20 ideas for printable planners for busy moms / new business owners / teachers.”
Clarifying your visual style
“Describe a visual style for a calming, minimalist student planner. Include colors and vibe.”
Writing better prompts for Firefly
“Write 10 detailed prompts for watercolor floral backgrounds in soft neutral colors for wedding stationery."
Helping with copy for your product
“Write an Etsy title and description for a modern weekly planner template for busy professionals.”
You’re still in charge creatively. These tools just speed up the thinking, planning, and writing parts so you can stay focused on the art.
Why Canva is still the best place to build your templates
Now let’s talk about Canva.
If Adobe is your art studio, Canva is your template workshop.
Most Etsy buyers:
- Don’t own Adobe software
- Don’t know how to use Photoshop or Illustrator
- Want something they can easily edit without a learning curve
That’s exactly where Canva shines.
1. Canva feels simple and familiar to your buyers
Selling Canva templates means your customers can:
- Change text, colors, and some design elements
- Use a free or low-cost tool they likely already know
- Avoid anything technical, like dealing with PSD or AI files
That alone makes your product more attractive and reduces support questions.
2. Canva is built for layout and usability
Canva is excellent for:
- Setting up page sizes, margins, and grids
- Creating consistent layouts across multiple pages
- Duplicating pages for planners, journals, and workbooks
- Keeping everything clean and organized for your customer
So instead of wrestling with Adobe for every piece of text and alignment, you use Canva to handle the structure and user-friendliness of your final product.
The big idea: Adobe for originality, Canva for usability
Here’s the simple way to think about this:
- Use Adobe to create original artwork and visual assets. AND
- Use Canva to turn those assets into easy-to-use, Etsy-ready templates.
This combo gives you:
- Designs that look more unique and professional than standard Canva-only templates
- A smoother editing experience for your buyers
- A clear workflow you can repeat product after product
Step-by-step workflow: From idea to Etsy listing
Let’s put this into a practical, repeatable process you can follow.
Step 1: Use AI to plan your product
Start by defining:
1. What kind of product you’re making?
- Planner pages
- Wall art
- Journals or habit trackers
- Business cards or thank-you cards
- Checklists or worksheets
2. Who it’s for?
- Busy moms, freelancers, students, teachers, brides, etc.
Then, use Gemini or ChatGPT to help you brainstorm.
Example prompts you can copy/paste:
- “Give me 15 ideas for printable weekly planners for busy moms. Include theme, style, and any special sections that would be helpful.”
- “Describe 10 wall art ideas for a neutral, boho-style living room. Include colors, fonts, and overall mood.”
Pick one idea to start with. Not the perfect one, just one you can actually finish.
Step 2: Create your core artwork in Adobe
Now move into Photoshop or Illustrator.
Here are the types of assets that work really well for this workflow:
- Background textures and patterns
- Borders, frames, and decorative elements
- Illustrated icons or small graphics
- Watercolor splashes or organic shapes
- Abstract shapes and patterns
Tips to keep it practical:
- Work at 300 DPI for print quality
- Use standard print sizes (US Letter, A4, 8x10, 5x7, etc.)
- Export assets as **high-resolution PNGs** (for elements with transparency) or **JPGs** (for full backgrounds)
You can use Adobe’s AI (like Firefly) to generate starting points, then:
- Refine the results
- Combine multiple elements
- Adjust color and detail
The goal is to end up with artwork that feels like your style, not just “AI output.”
Step 3: Export and organize your assets
Once your artwork is ready:
- Export your elements:
- PNG for icons, illustrations, overlays, and anything that needs a transparent background
- JPG or PNG for full-page backgrounds or textures
- Organize them in folders by project, for example:
- `/Planner-Minimal-Weekly`
- `/WallArt-BohoSet`
- `/Wedding-MenuCards`
You’re basically creating a small “asset library” you’ll bring into Canva.
Step 4: Build the template in Canva
Now open Canva and create a new design in the size you need.
1. Upload your Adobe assets into Canva
2. Start laying out your page(s):
- Place your background or header artwork
- Add text boxes for titles, labels, and body text
- Use Canva’s alignment tools to keep everything neat
- Duplicate pages for multi-page products (planners, journals, etc.)
Think like your customer:
- Where will they want to type or edit text?
- Which colors should be easy for them to change?
- What parts should stay locked-in so the design doesn’t fall apart?
You’re designing for clarity and ease, not just looks.
Step 5: Test for print quality
Before you list your product, do a quick quality check.
1. Download your design from Canva as:
- PDF Print (great for planners, worksheets, etc.), or
- High-resolution PNG/JPG for wall art
2. Print a test copy:
- At home on your printer, or
- At a local print shop
Check things like:
- Are the colors too light or too dark on paper?
- Is all the text easy to read at the final size?
- Are margins safe, or is anything too close to the edge?
If something looks off:
- Tweak the layout or font size in Canva
- If the artwork itself needs adjustment (too grainy, too low-contrast), edit it back in Adobe and re-upload
This extra step is what makes your product actually “print beautifully,” not just look good on screen.
Step 6: Turn your design into a Canva template
Most Etsy sellers deliver Canva products using a template link.
Your process might look like this:
1. Finalize a master version of your design in Canva
2. Get the “use as template” share link inside Canva
3. Create a simple PDF for your buyers that includes:
- A button or link to the Canva template
- Short instructions on how to open and edit it
- Basic print recommendations (size, paper type, etc.)
This PDF becomes the digital file your customer downloads from Etsy.
Step 7: Use AI again for your Etsy listing
Finally, go back to Gemini or ChatGPT and let it help you write your:
- Etsy title
- Description
- List of features and benefits
- Tags and keywords
Example prompt:
“I’ve created a printable weekly planner template in Canva for busy moms. It has a soft neutral color palette, sections for schedule, priorities, meals, and notes. It’s US Letter and A4 size and delivered as a Canva template. Write an SEO-friendly Etsy title, a detailed description, and 13 tag ideas.”
You can then lightly edit the output so it sounds like you.
Final thoughts: Your creativity is the real differentiator
Adobe, Canva, Firefly, Gemini, and ChatGPT are all powerful tools, but they’re still just tools.
What makes your Etsy products special is:
Your taste in color, layout, and style, your understanding of your audience and what they need and your willingness to experiment, refine, and keep improving
By:
- Using Adobe + AI to create original artwork
- Using Canva to package that artwork into easy-to-edit templates
- Using agentic tools like Gemini and ChatGPT to support your ideas and writing
…you build a workflow that’s both creative and efficient. That’s how you end up with printable products that look professional, feel unique, and are actually enjoyable for your customers to use.
If this feels like a lot, start small:
Pick one simple product idea, follow this process from beginning to end once, and let that first finished product teach you what to improve next.